In this post, I'll walk you through the steps I followed to install OpenCV and Python using Homebrew on macOS Sierra (10.12.6).
Install the Xcode Command Line Tools
To install the Xcode Command Line Tools, enter the following command:
sudo xcode-select --install
To check that they have been installed:
sudo xcode-select -p
If you see:
/Applications/Xcode.app/Contents/Developer
Then you're good to go.
Install Homebrew
To install Homebrew, enter the following command:
ruby -e "$(curl -fsSL https://raw.github.com/Homebrew/homebrew/go/install)"
.bashrc is a shell script located in your home directory that Bash runs whenever it is started interactively. You can locate your home directory using the following command:
echo $HOME
You should see output like:
/Users/rob
Or:
echo ~
You should see output like:
/Users/rob
Update your .bashrc file:
cd /Users/rob
nano .bashrc
As follows:
# Homebrew
export PATH=/usr/local/bin:$PATH
Note: If you don't want to maintain two separate config files for login and non-login shells, put your common settings in ~/.bashrc and make sure you source it from your ~/.bash_profile:
if [ -r ~/.bashrc ]; then
 source ~/.bashrc
fi
Take a look at the files in you home directrory:
cd ~
ls -al
You should see output like:
...

-rw-------     1 rob  staff  10838  6 Oct 07:15 .bash_history
-rw-r--r--     1 rob  staff     49 18 Sep 10:47 .bash_profile
drwx------    22 rob  staff    748  6 Oct 07:18 .bash_sessions
-rw-r--r--     1 rob  staff    625  5 Oct 11:45 .bashrc

...
Load the changes into your current shell:
source ~/.bashrc
Check your environment:
brew doctor
Then check for updates:
brew update
Install Python 3
To install Python 3 using Homebrew, enter the following command:
brew install python3
To check that Python 3 has been correctly installed:
which python3
You should see:
/usr/local/bin/python3
If you see /usr/local/bin/python3 then you are using the Homebrew version of Python 3. If you see /usr/bin/python3 then you are using the system version of Python 3.
You can check the version by running the following command:
python3 --version
You should see output like:
Python 3.6.3
Install OpenCV 3
First we need to tap the Homebrew Science repo:
brew tap homebrew/science
Now we're ready to install OpenCV 3 using Homebrew:
brew install opencv3 --with-contrib --with-python3
Setup a Python 3 Virtual Environment
The virtualenv and virtualenvwrapper packages allow us to create virtual environments so that we can work on multiple projects without introducing conflicts in their dependencies.
To install virtualenv and virtualenvwrapper we use pip (Python's Package Manager):
pip3 install virtualenv virtualenvwrapper
We also need to update ~/.bashrc:
# Virtualenv/VirtualenvWrapper
VIRTUALENVWRAPPER_PYTHON='/usr/local/bin/python3'
source /usr/local/bin/virtualenvwrapper.sh
export WORKON_HOME=$HOME/.virtualenvs
Note: The virtualenv install will create a new directory (in your home directory) for your virtual environments:
...

drwxr-xr-x    16 rob  staff    544  5 Oct 11:54 .virtualenvs

...
Now we're ready to create a Python 3 virtual environment:
mkvirtualenv cv3 -p python3
We can access the cv3 Python 3 virtual environment, by running the following command:
workon cv3
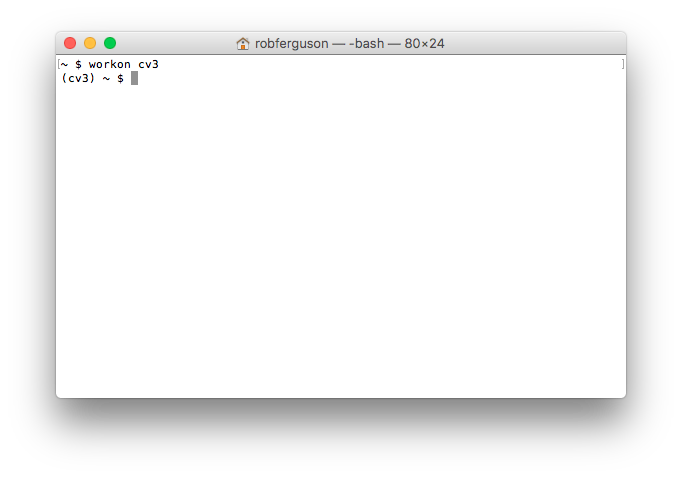
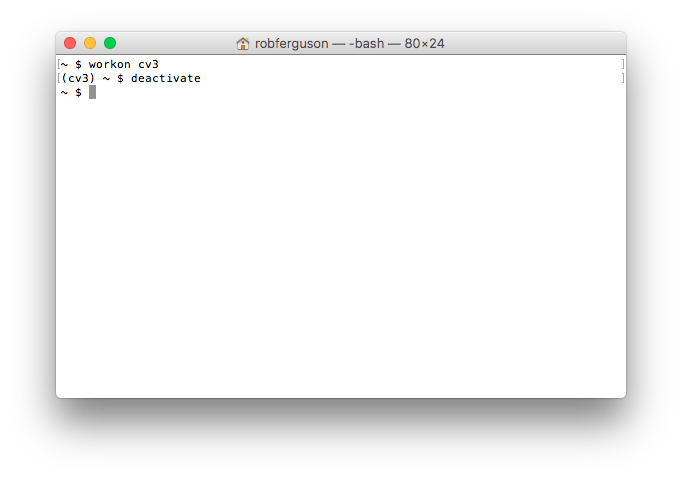
To exit the cv3 Python 3 virtual environment:
deactivate
You should see output like:
Install NumPy
The only Python prerequisite for OpenCV is NumPy, the fundamental package for scientific computing.
To install numpy we use pip:
workon cv3
pip3 install numpy
deactivate
Create a symbolic link to the OpenCV 3 bindings
We can create a symbolic link to the OpenCV 3 bindings using the following commands:
cd ~/.virtualenvs/cv3/lib/python3.6/site-packages/
ln -s /usr/local/opt/opencv/lib/python3.6/site-packages/cv2.cpython-36m-darwin.so cv2.so
Note: If you are wondering why the OpenCV 3 Python bindings are named 'cv2' (cv2.cpython-36m-darwin.so) then take a look at this post.
Now, let's check that everything is working as expected:
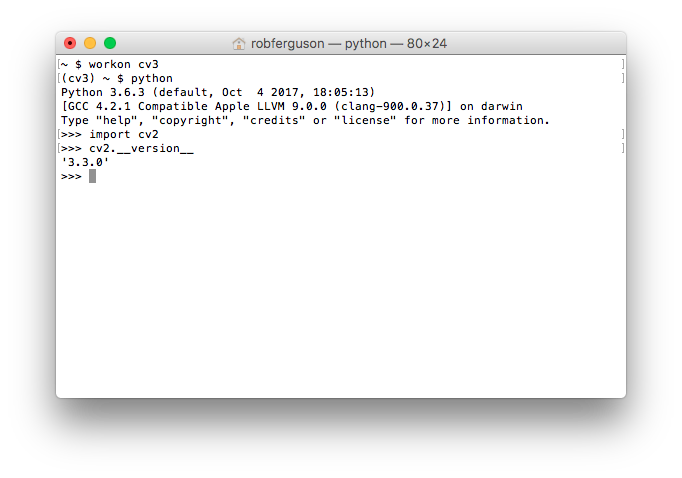
Use 'Ctrl-D' (to exit the Python interpreter) and 'deactivate' (to exit the cv3 virtual environment).
Install a Python IDE
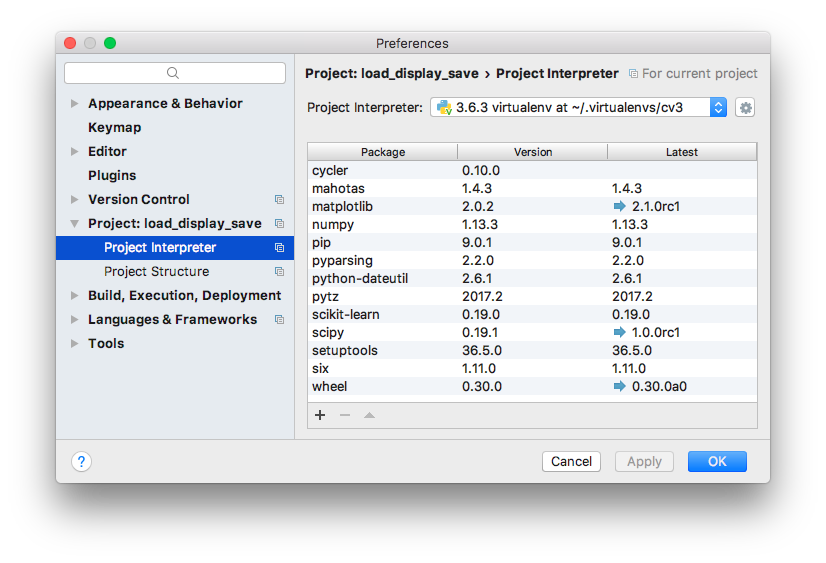
If you're looking for a Python IDE why not take a look at PyCharm:

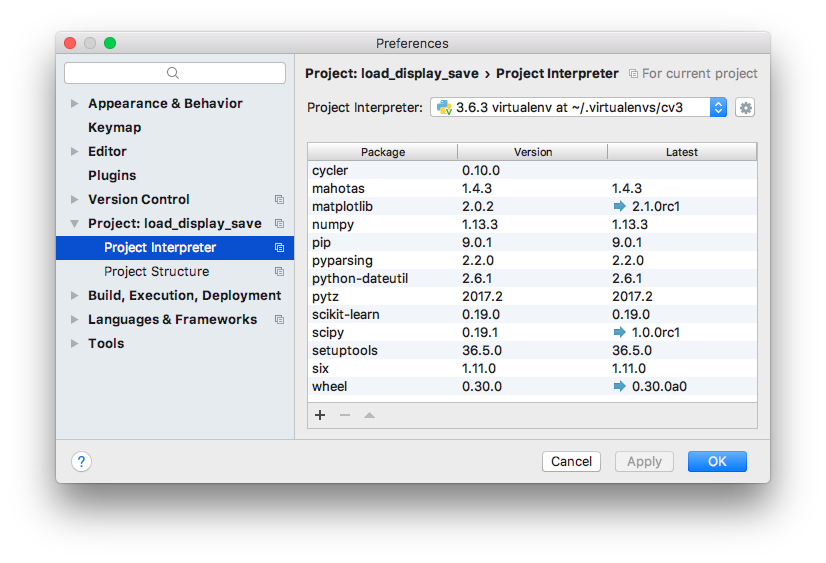
You can configure it to work with your virtual environments:
References:
- pyimagesearch blog: Install OpenCV on macOS
- GitHub gist: Python3, Pip3, Virtualenv and Virtualenvwrapper Setup
- Safari Books Online blog: Keeping Your Homebrew Up to Date
