
In a previous post, I wrote about installing Git, Maven and the Eclipse IDE on Elementary OS in order to start working with the eXo Platform.
In this post, I'll walk you through the steps required to create your own eXo Platform theme (eXo refers to themes as 'skins').
Branding
The eXo Platform has basic branding support, you can upload your company logo and choose between a light navigation bar or a dark navigation bar.
The platform-ui project
In order to create a custom theme, the first thing we need to do is to clone the eXo Platform's platform-ui project.
I'm going to use the Eclispe IDE to import the project:

Select 'Projects from Git', then click the Next button:

Select 'Clone URI', then click the Next button:

Enter the project's URI: https://github.com/exoplatform/platform-ui.git then click the Next button:
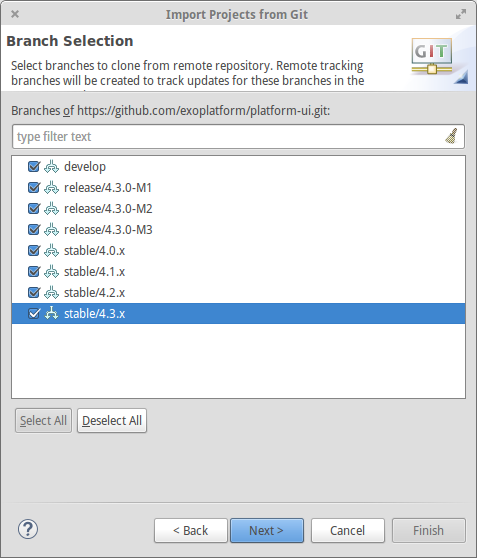
Select the most recent stable branch, then click the Next button:

Choose a local (destination) directory and an initial branch, then click the Next button:
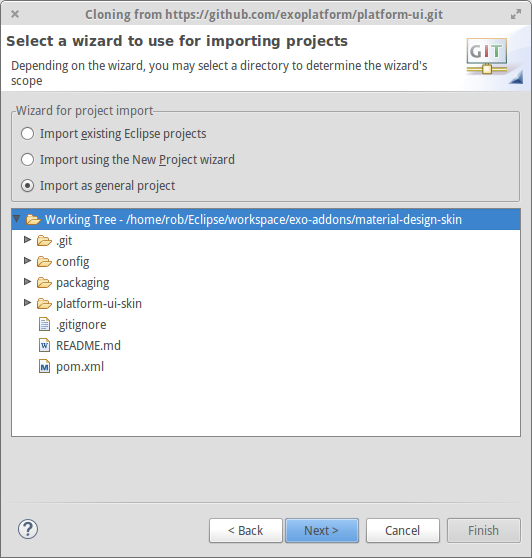
Choose 'Import as general project', then click the Next button:
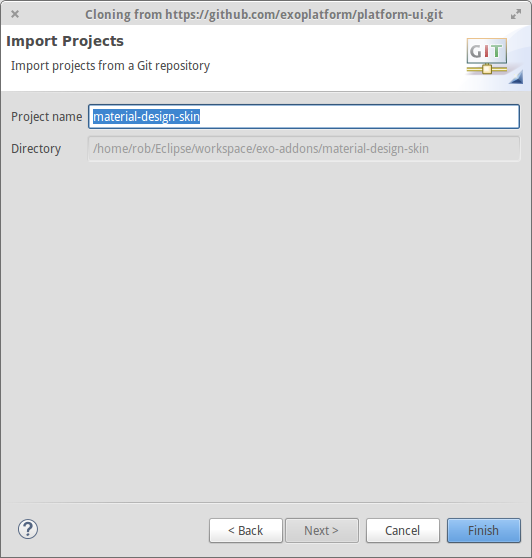
Enter a project name, then click the Finish button and Eclispe will create a new project in the Project Explorer:

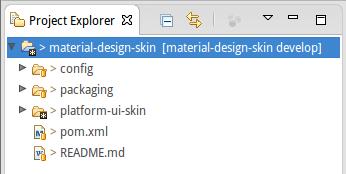
We're using Git (and GitFlow) so before we do anything else lets create a develop branch:
Tip: If you can't see hidden files in the Project Explorer, click on the 'View Menu' button (the little down arrow):

Select 'Customize View...':
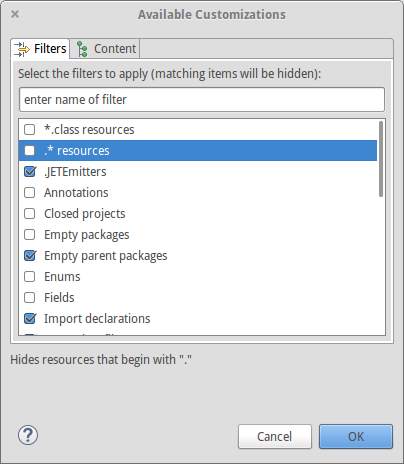
Uncheck the '.*resources' option then click the OK button (you may also need to use Ctrl-h in the File Manager).
Creating a custom theme
Now that we have successfully cloned the platform-ui project, its time to uniquely identify our new project by choosing some Maven coordinates:

I entered a new Group Id: org.robferguson.platform-ui, Version: 1.0.x-SNAPSHOT and updated the 'platform-ui-skin-final-name' property: MaterialDesignSkin
Next we need to replace each instance of 'org.exoplatform.platform-ui' with org.robferguson.platform-ui, 4.3.x-SNAPSHOT with 1.0.x-SNAPSHOT and 'eXoSkin' with MaterialDesignSkin in the following files:
- /material-design-skin/platform-ui-skin/src/main/webapp/WEB-INF/web.xml
- /material-design-skin/platform-ui-skin/pom.xml
- /material-design-skin/packaging/pom.xml
- /material-design-skin/config/pom.xml
- /material-design-skin/config/src/main/resources/conf/configuration.xml
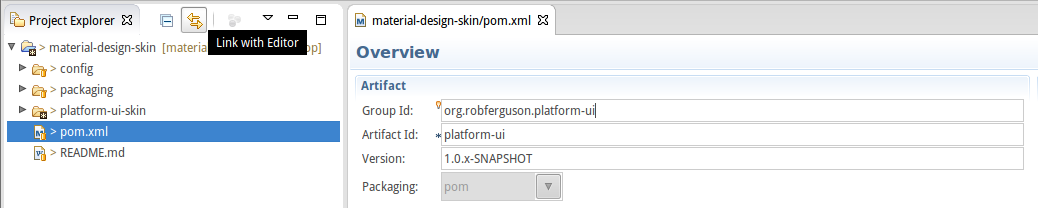
Tip: If you have mutiple files with the same name but in different directories (e.g., pom.xml, variables.less or styles.less) then you might find it helpful to use Eclipse's 'Link with Editor' option:
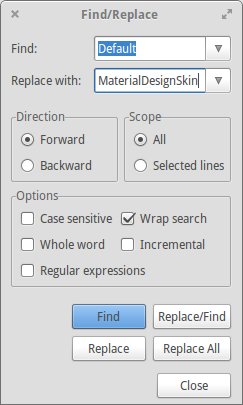
Then we need to replace each instance (~80) of 'Default' with MaterialDesignSkin in the following file:
- /material-design-skin/platform-ui-skin/src/main/webapp/WEB-INF/gatein-resources.xml
Now you can start customising your theme by modifying: /material-design-skin/platform-ui-skin/src/main/webapp/skin/less/variables.less
For example, to use the Roboto typeface:
@import "../bootstrap/less/variables.less";

@import url(http://fonts.googleapis.com/css?family=Roboto:300,400,500,700);

@sansFontFamily: roboto, sans-serif;
@sansBoldFontFamily: 'roboto medium', sans-serif;
@monoFontFamily: 'roboto mono', monospace;

@baseFontSize: 13px;
@baseFontFamily: @sansFontFamily;
@baseLineHeight: 20px;
@headingsFontWeight: medium;

...
or to host the font locally:
...

@font-path: "/MaterialDesignSkin/skin/fonts";

@font-face {
  font-family: roboto;
  src: url('@{font-path}/roboto/Roboto-Light-webfont.woff')
       format('woff');
  font-weight: 300;
  font-style: normal;
}

@font-face {
  font-family: roboto;
  src: url('@{font-path}/roboto/Roboto-Regular-webfont.woff')
       format('woff');
  font-weight: 400;
  font-style: normal;
}

...
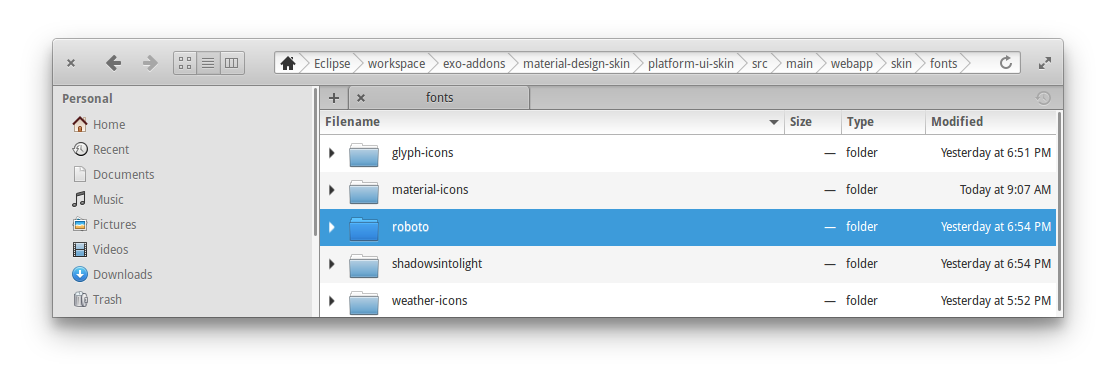
Note: If you host a font locally, you'll also need to place the font files in the project's fonts folder:
To use the Material Design Icons:
@import url(http://fonts.googleapis.com/icon?family=Material+Icons);
or to host the font (icons) locally:
@font-face {
  font-family: 'Material Icons';
  src: url('@{font-path}/material-icons/MaterialIcons-Regular.woff2')
       format('woff2');
  font-weight: 400;
  font-style: normal;
}
The platform-ui project uses numeric character references:
.uiIconSearch:before {
  content: "\e74a";
}
So you will need to refer to the material icons codepoints index (which includes a complete list of icon names and character codes).
Lets make sure we can build and deploy our custom theme, in the Project Explorer right click on /material-design-skin/pom.xml and choose 'Run As => Maven Build ...':

Enter the project Goals: clean install then click the Run button:
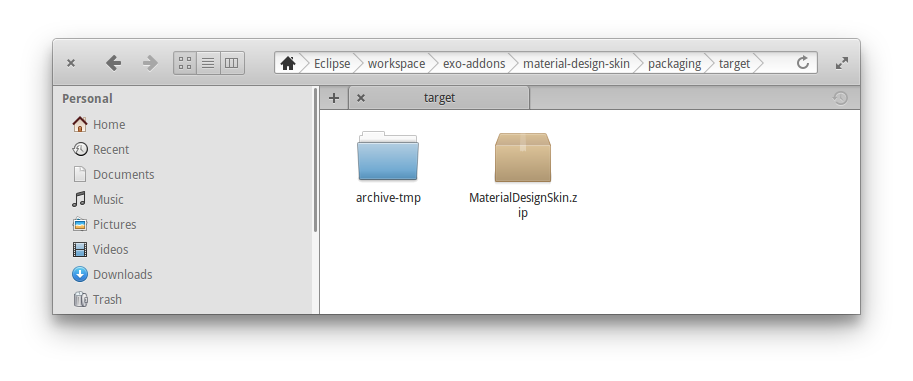
If all goes well you'll find a .zip file in the target directory.
Next we need to create a local.json file in the addons directory.
cd ~/platform-community-4.3.0/addons
sudo nano local.json
With the following contents:
[
 {
 "id": "MaterialDesignSkin",
 "version": "1.0.x-SNAPSHOT",
 "name": "Material Design Skin",
 "description": "Material Design, The Visual Language",
 "downloadUrl": "file:///home/rob/Eclipse/workspace/exo-addons/material-design-skin/packaging/target/MaterialDesignSkin.zip",
 "vendor": "Rob Ferguson",
 "license": "LGPLv3",
 "supportedDistributions": ["community","enterprise"],
 "supportedApplicationServers": ["tomcat","jboss"]
 }
]
Now we can install our new theme:
cd ~/platform-community-4.3.0
./addon install MaterialDesignSkin --snapshots
You should see output like:
Installing MaterialDesignSkin:1.0.x-SNAPSHOT
Copying add-on MaterialDesignSkin:1.0.x-SNAPSHOT archive
Add-on MaterialDesignSkin:1.0.x-SNAPSHOT installed.
Note: To uninstall the theme: ./addon uninstall MaterialDesignSkin
Now restart the eXo Platform:
./start_eXo.sh
When you see the following line (it might take a minute or two):
Server startup in 113427 ms [org.apache.catalina.startup.Catalina<main>]
Open your browser and navigate to: http://localhost:8080
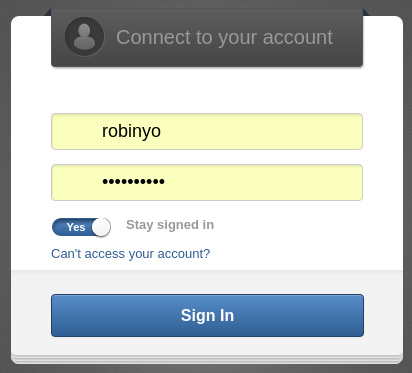
Sign in then navigate to 'Administration => Portal => Sites', and click the 'Edit Site Configuration' button:
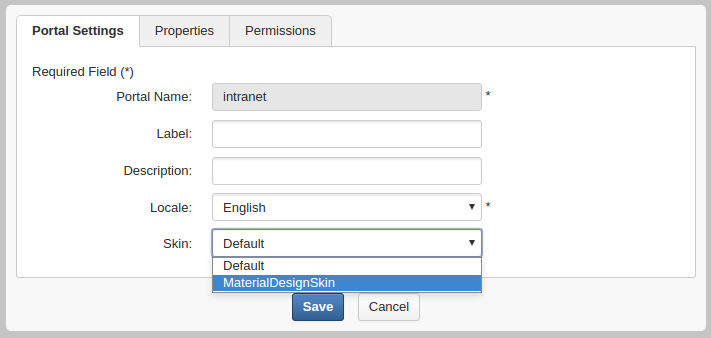
Choose the Skin: MaterialDesignSkin then click the Save button.
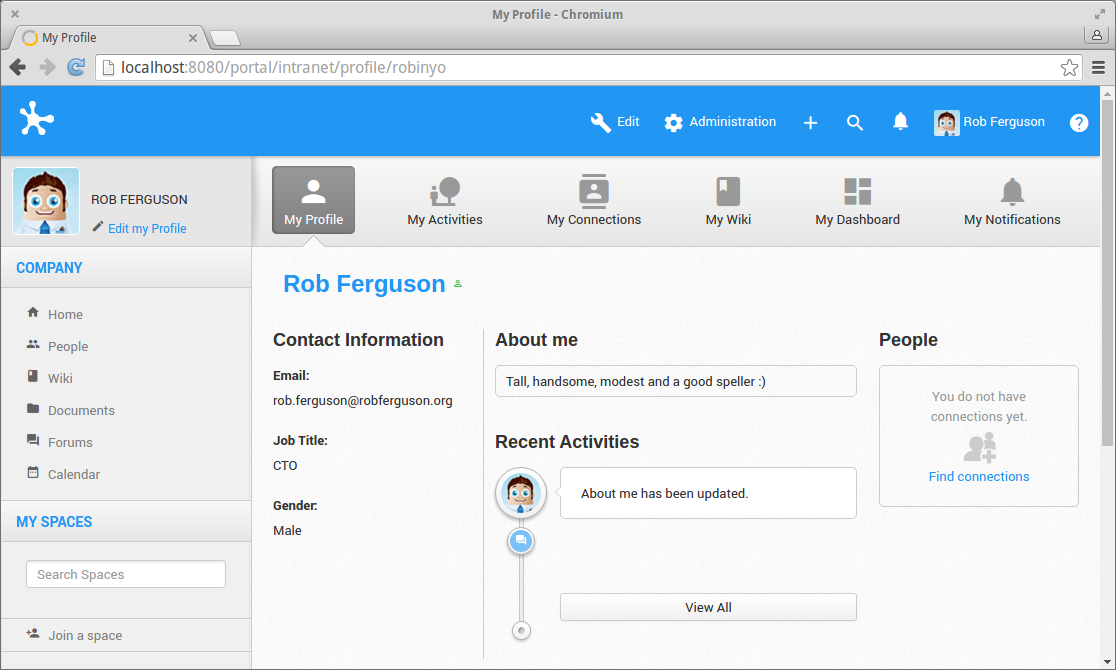
Refresh the page and enjoy your theme's (skin's) new typography, new icons and new colours:
References:
- eXo Platform Documentation: Creating a new skin add-on
- eXo Platform Documentation: Customising a skin - Best Practices
- Google: Google Design
- Material Design: Color
- Material Design: Typography
- Material Design: Icons
- Material Design Icons - Issue 205: Self-Hosted Material Icon Not Showing
- Vincent Driessen: A successful Git branching model
- Rob Ferguson: Customising the Ionic Framework with Sass