
In a previous post, I showed you how to use Ionic's $colors map.
In this post, I'll show you how to use SVG icons with Ionic's Tabs component, how to change a SVG icon's colour and how to provide a platform specific Back Button icon.
The Tabs Component
Ionic's <ion-tabs> component provides users with the ability to quickly switch between the pages of your app. Out of the box the Tabs component works with Ionic's ionicons.
If you want to use SVG icons in your Tabs component here's what you need to do.
fa-icons.scss
I created a Sass (Syntactically Awesome Style Sheets) file for all my Font Awesome SVGs:
...

// $fal-map-marker: url(../assets/imgs/icons/fal-map-marker-alt.svg);
// $fas-map-marker: url(../assets/imgs/icons/fas-map-marker-alt.svg);
$fal-map-marker: url('data:image/svg+xml;utf8,<svg ... >');
$fas-map-marker: url('data:image/svg+xml;utf8,<svg ... >');

...
All my Font Awesome icons have a "fa-" prefix:
ion-icon {

  ...

  &[class*="fa-fal-map-marker"] {
    mask-image: $fal-map-marker;
    .tab-button[aria-selected=true] & {
      mask-image: $fas-map-marker;
    }
  }
  &[class*="fa-fas-map-marker"] {
    mask-image: $fas-map-marker;
  }

  ...

}
And I created a style to apply to all my Font Awesome icons:
ion-icon {

  &[class*="fa-"] {
    mask-size: contain;
    mask-position: 50% 50%;
    mask-repeat: no-repeat;
    background: currentColor;
    width: 1em;
    height: 1em;
  }

  ...

}
Note: The background is masked by the SVG and because there is no content we have to manually set the size.
variables.scss
Now update 'variables.scss' as follows:
...

// @import "ionic.ionicons";
@import "./fa-icons";

...
Update your template:
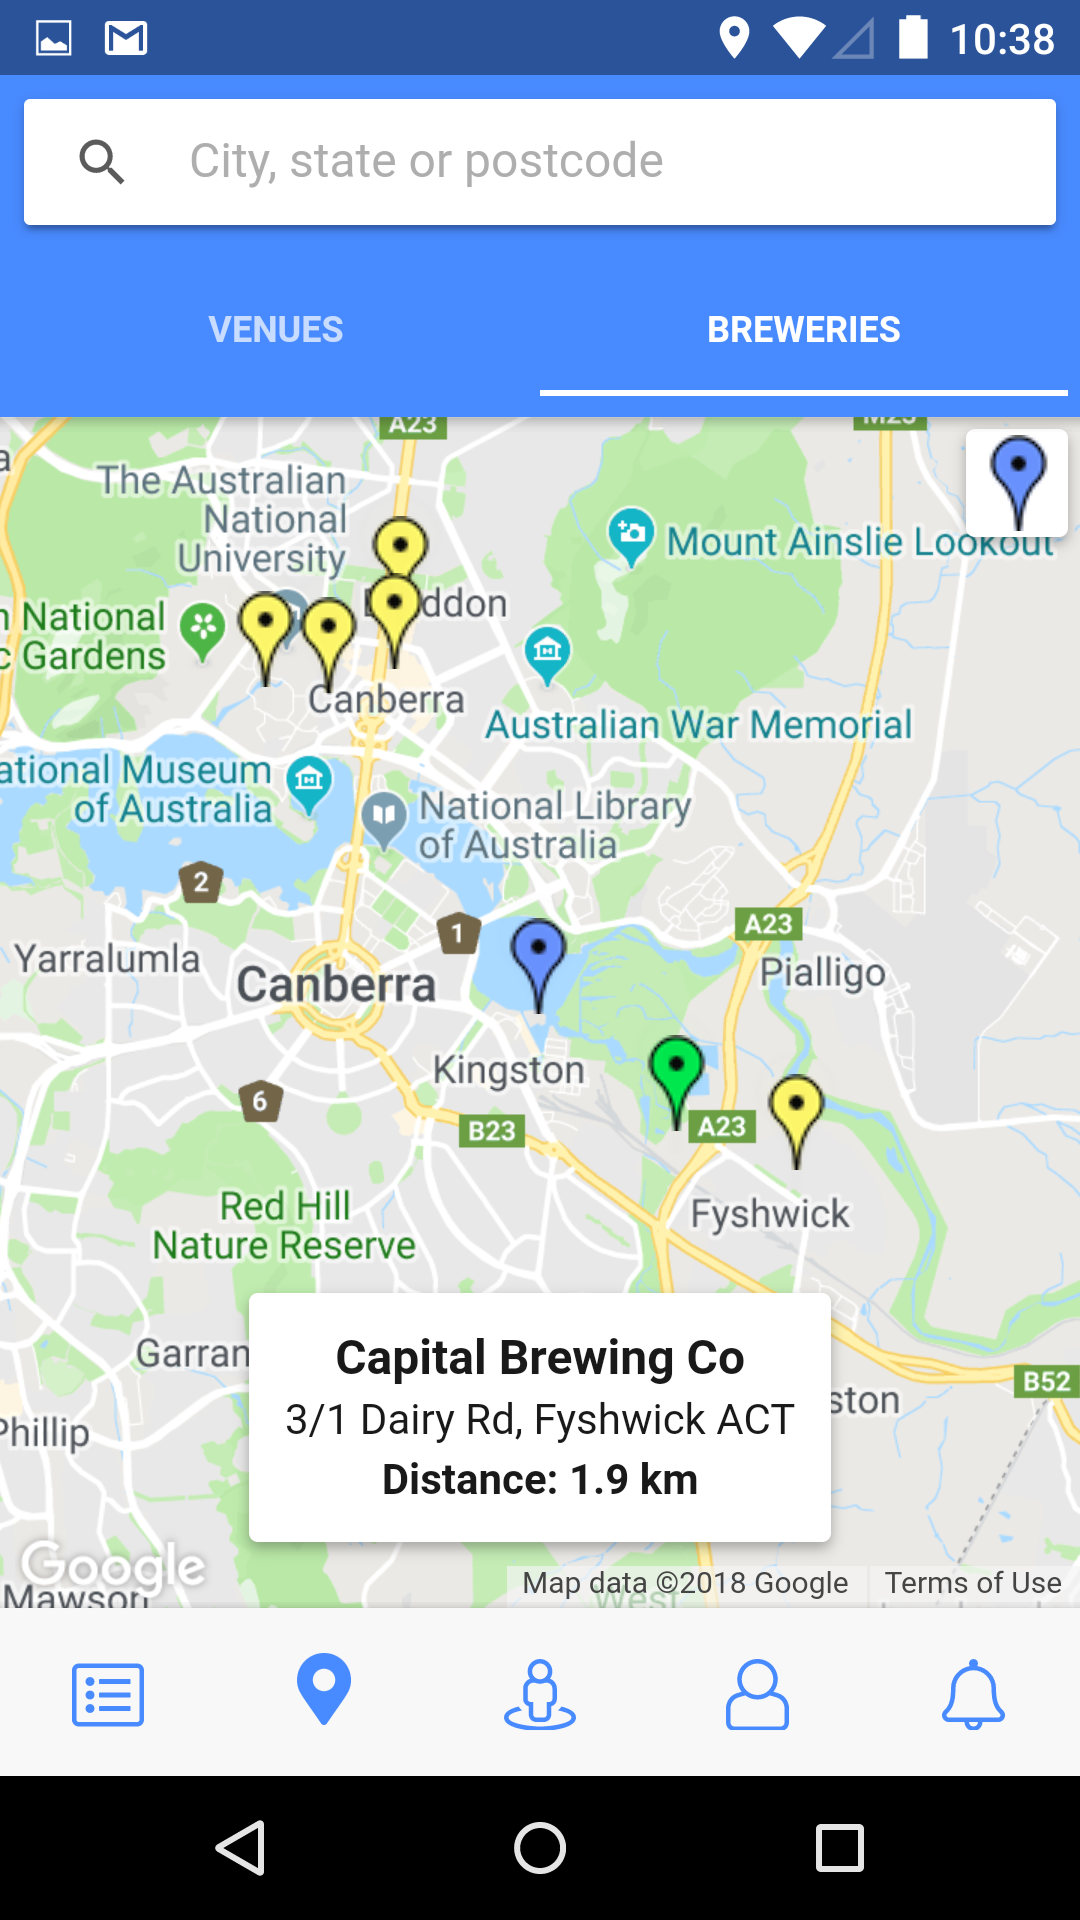
<ion-tabs #tabs>
  <ion-tab [root]="tab0Root" tabUrlPath="activity-tab" tabIcon="fa-fal-list"></ion-tab>
  <ion-tab [root]="tab1Root" tabUrlPath="location-tab" tabIcon="fa-fal-map-marker"></ion-tab>
  <ion-tab [root]="tab2Root" tabUrlPath="search-tab" tabIcon="fa-fal-street-view"></ion-tab>
  <ion-tab [root]="tab3Root" tabUrlPath="person-tab" tabIcon="fa-fal-user"></ion-tab>
  <ion-tab [root]="tab4Root" tabUrlPath="notifications-tab" tabIcon="fa-fal-bell"></ion-tab>
</ion-tabs>
And your good to go:
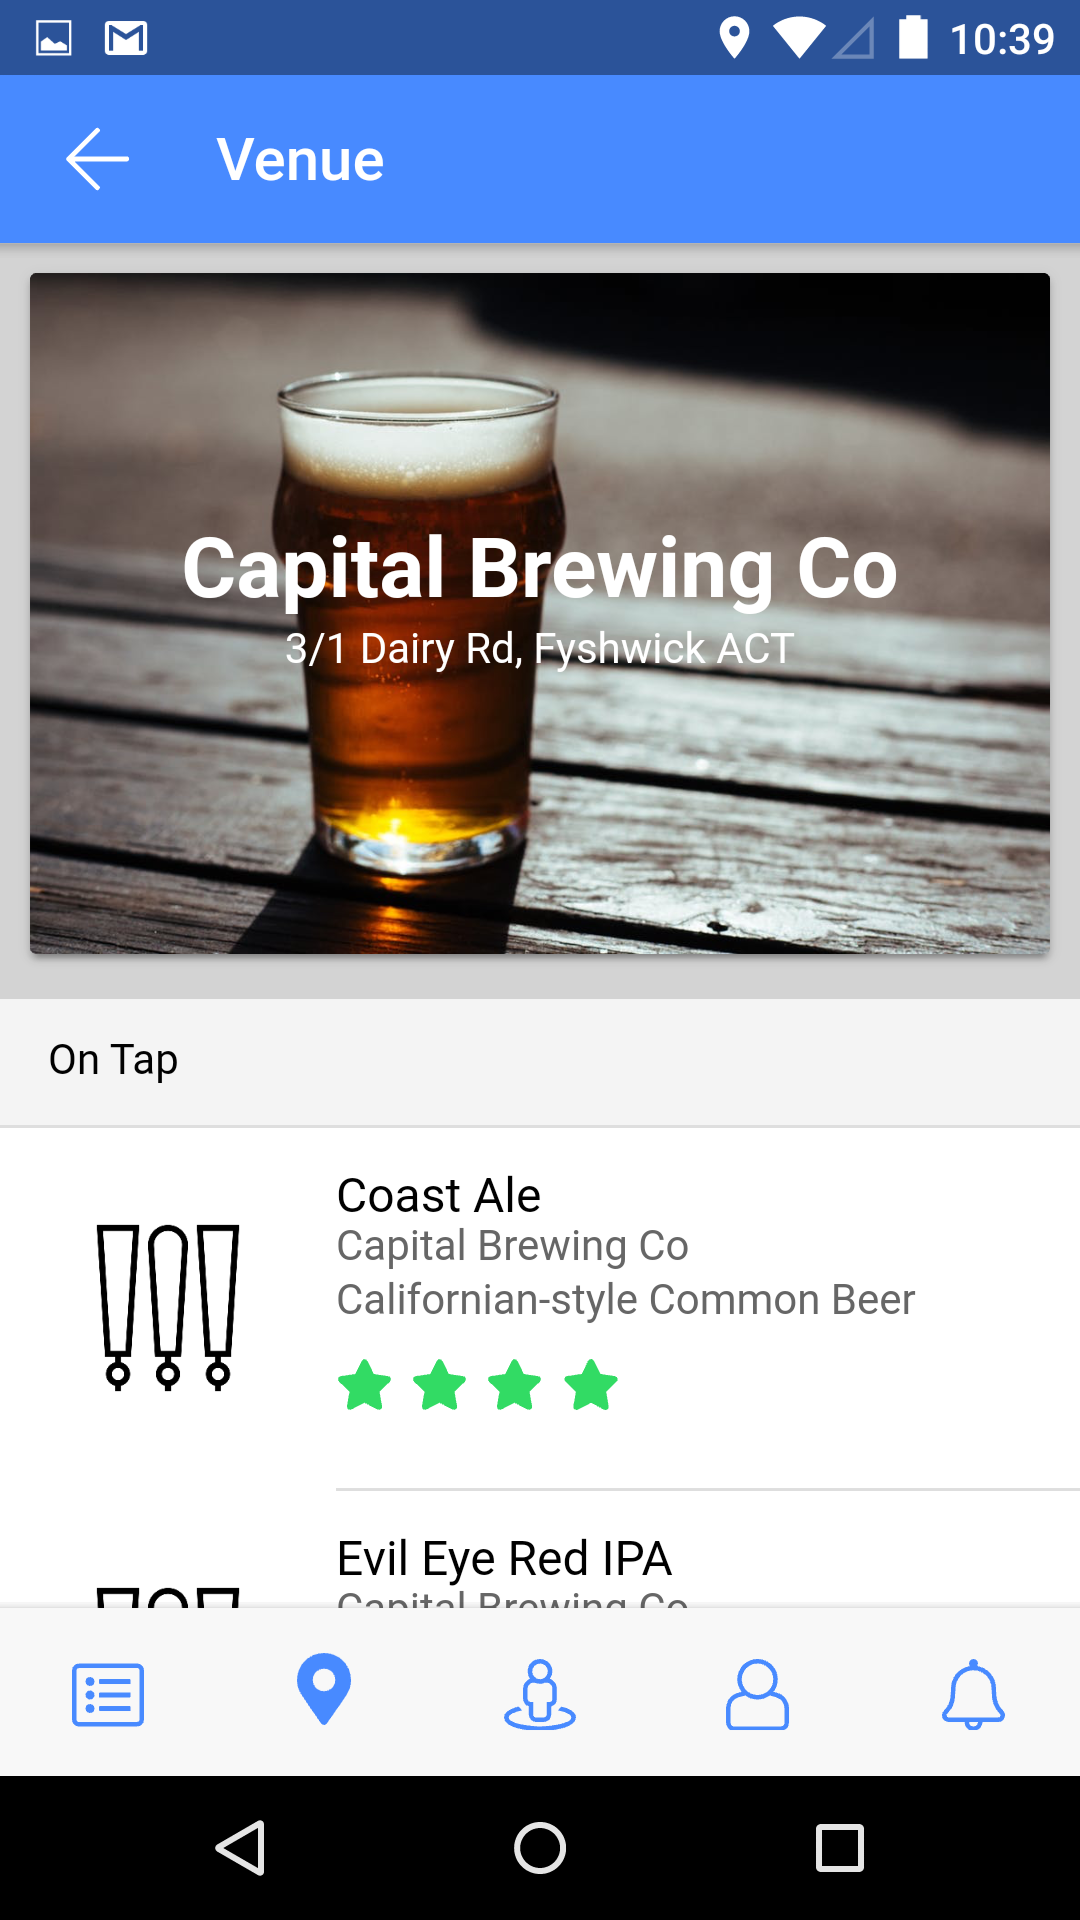
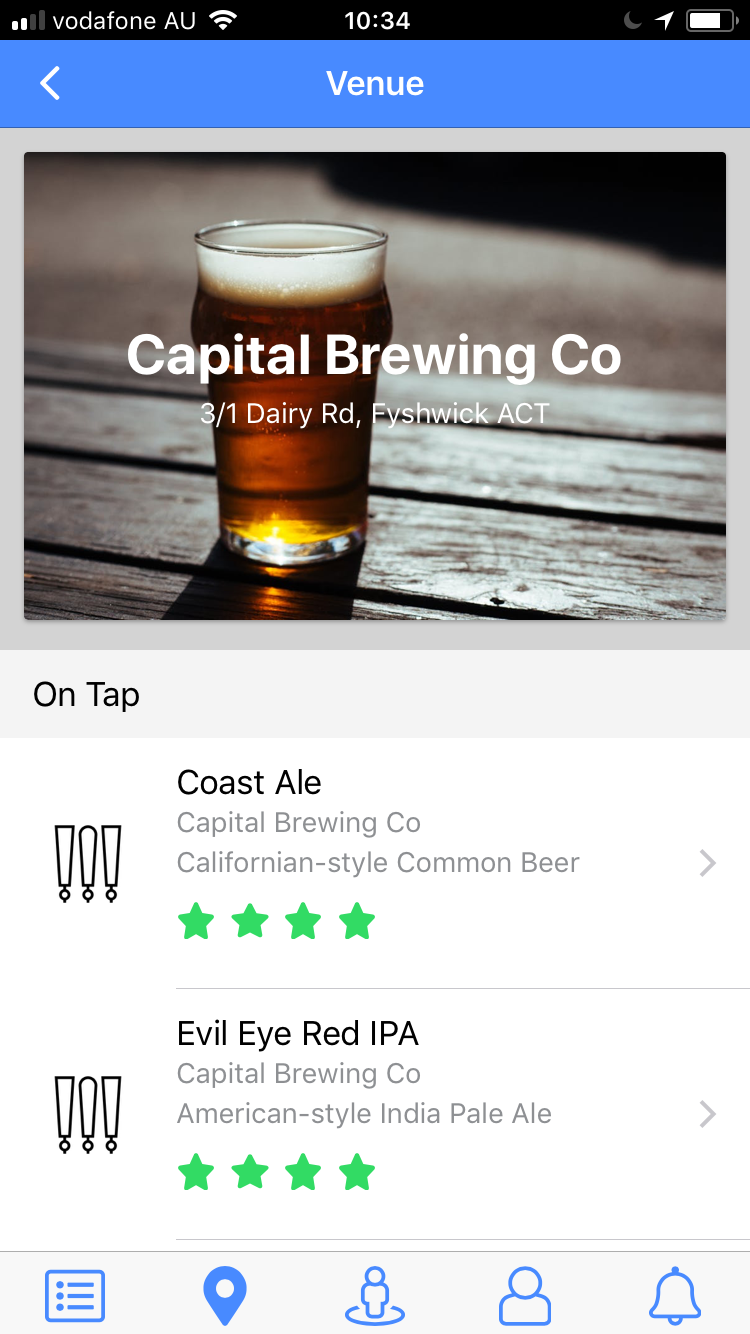
SVG Colour
To change a SVG icon's colour, here's what you need to do:
page-venue {

    ion-icon {

      ...

      &[class*="fa-fas-star"] {
        color: #32db64 !important;
      }

      &[class*="fa-fal-star"] {
        color: #32db64 !important;
      }

      ...

  }

}
The Back Button Icon
Ionic's Config lets you configure your entire app or specific platforms.
app.component.ts
You can inject Config into your App component:
...

import { Config, Platform } from 'ionic-angular';

...

@Component({
  templateUrl: 'app.component.html'
})
export class MyAppComponent implements OnInit, OnDestroy {

  public rootPage: any = 'TabsPage';

  constructor(public config: Config,
              public platform: Platform,
              private geolocationService: GeolocationService,
              private logger: LoggerService) {

  }

  ...

}
And then in the App component's ngOnInit():
  public ngOnInit() {

    if (this.platform.is('ios')) {
      this.config.set('backButtonIcon', 'fa-fal-angle-left');
    } else if (this.platform.is('android')) {
      this.config.set('backButtonIcon', 'fa-fal-arrow-left');
    }

    ...

  }
You can set your platform specfic 'backButtonIcon':
Resources:
- Ionic Forum: Anyway to customise the Tabs icon with my own SVG file?
- The Craft Beer Foundation: Brew - The Craft Beer App