In a previous post, I described the steps I followed to start working with AngularUI's Router. In this post, I'll describe the steps I followed to start working with Fabric.js.
Fabric.js
"Fabric.js is a powerful and simple Javascript HTML5 canvas library.
Fabric provides an interactive object model on top of the <canvas> element. Fabric also includes an SVG-to-canvas (and canvas-to-SVG) parser" - fabricjs.com
Let's add Fabric.js to the project:
bower install fabric --save
Here's what the updated dependencies section in the bower.json file contains:
"dependencies": {
  "angular": "~1.4.8",
  "angular-bootstrap": "~0.14.3",
  "bootstrap-css": "3.1.1",
  "angular-animate": "~1.4.8",
  "angular-ui-router": "~0.2.15",
  "fabric.js": "fabric#~1.5.0"
}
We also need to include fabric.js in our index.html file (in the /client folder):
<!DOCTYPE html>
<html>
  ...
  <body ng-app="my-2d-diagram-editor">
    <div ui-view></div>
    ...
    <script src="bower_components/fabric.js/dist/fabric.js"></script>
    ...
  </body>
</html>
angular-fabric
While doing research into HTML5 diagramming libraries and Fabric.js in particualr, I found the angular-fabric project. As you may (or may not) know AngularJS has its own way of doing things, so when I found the angular-fabric project, I thought I would give it a try (even though there hasn't been much activity of late).
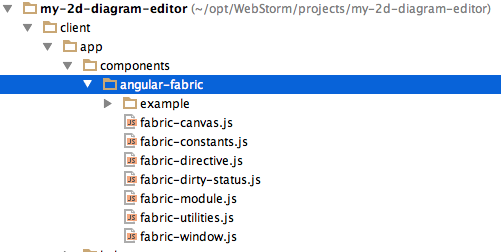
There's no Bower support so I used GitHub's "Download ZIP" feature, extracted the files into the project's /components folder and then renamed the files using lisp-case:

Note: angular-fabric requires jQuery, however, with a little effort I hope to get it working with jqLite which is a jQuery-like library (included with AngularJS) that provides a subset of jQuery functionality.
Let's add jQuery to the project:
bower install jquery
We need to update the index.html file (in the /client folder) as follows:
<!DOCTYPE html>
<html>
  ...
  <body ng-app="my-2d-diagram-editor">
    <div ui-view></div>
    <script src="bower_components/jquery/dist/jquery.min.js">
      </script>

    <script src="bower_components/angular/angular.js">
      </script>
    ...
    <script src="bower_components/fabric.js/dist/fabric.js">
      </script>
    <script src="app/components/angular-fabric/fabric-module.js">
      </script>
    <script src="app/components/angular-fabric/fabric-canvas.js">
      </script>
    <script src="app/components/angular-fabric/fabric-constants.js">
      </script>
    <script src="app/components/angular-fabric/fabric-directive.js">
      </script>
    <script src="app/components/angular-fabric/fabric-dirty-status.js">
      </script>
    <script src="app/components/angular-fabric/fabric-utilities.js">
      </script>
    <script src="app/components/angular-fabric/fabric-window.js">
      </script>
    ...
  </body>
</html>
The ui-view directive tells Angular where to place our templates, we only have one so far app/main/main.html:
<div ng-include="'app/main/header.html'"></div>
<div class="row">
  <div ng-include="'app/main/sidebar.html'"></div>
  <div ng-include="'app/main/content.html'"></div>
</div>
The "content" partial (app/main/content.html) contains the <canvas> element and the fabric directive:
<div class="col-xs-8 col-xs-offset-4 col-sm-8 col-sm-offset-4
    col-md-9 col-md-offset-3">
  <!-- Content Area -->
  <div class="fabric-container">
    <canvas fabric="fabric"></canvas>
  </div>
</div>
We also need to update the module dependencies in the Application Module (app.js):
(function() {

  'use strict';

  angular.module('my-2d-diagram-editor', [
    'ngAnimate',
    'ui.bootstrap',
    'ui.router',
    'common.fabric',
    'common.fabric.utilities',
    'common.fabric.constants'
  ])
    .config(configApp);

    configApp.$inject = ['$stateProvider', '$urlRouterProvider'];

    function configApp($stateProvider, $urlRouterProvider) {

      $stateProvider
        .state('home', {
          url: '/',
          templateUrl: 'app/main/main.html',
          controller: 'MainController'
        });

      $urlRouterProvider.otherwise('/');
    }

})();
And update our Main Controller (main-controller.js) as follows:
(function() {

  'use strict';

  angular.module('my-2d-diagram-editor')
    .controller('MainController', ['$log', '$scope', 'Fabric',
        'FabricConstants',
      function($log, $scope, Fabric, FabricConstants) {

        $log.info('MainController');

        $scope.fabric = {};

        $scope.init = function () {
         $scope.fabric = new Fabric({
            JSONExportProperties: FabricConstants.JSONExportProperties,
            shapeDefaults: FabricConstants.shapeDefaults,
            rectDefaults: FabricConstants.rectDefaults,
            textDefaults: FabricConstants.textDefaults,
            json: {}
          });

          var grid = 50;
          var width = 600;
          var height = 600;

          // draw the Vertical lines
          for (var x = 0.5; x < width; x += grid) {
            $scope.fabric.addLine([ x, 0.5, x, width],
              { stroke: '#ccc', selectable: false });
          }

          // draw the Horizontal lines
          for (var y = 0.5; y < height; y += grid) {
            $scope.fabric.addLine([ 0.5, y, height, y],
              { stroke: '#ccc', selectable: false });
          }

          $scope.fabric.deselectActiveObject();
        };

        $scope.$on('canvas:created', $scope.init);
      }]);
})();
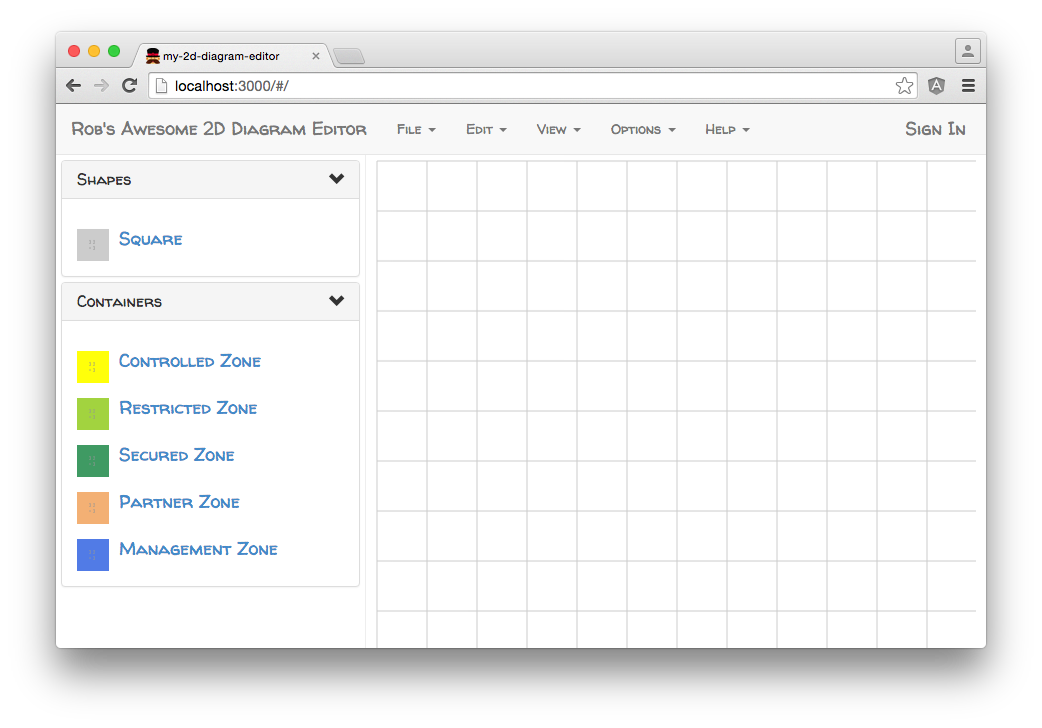
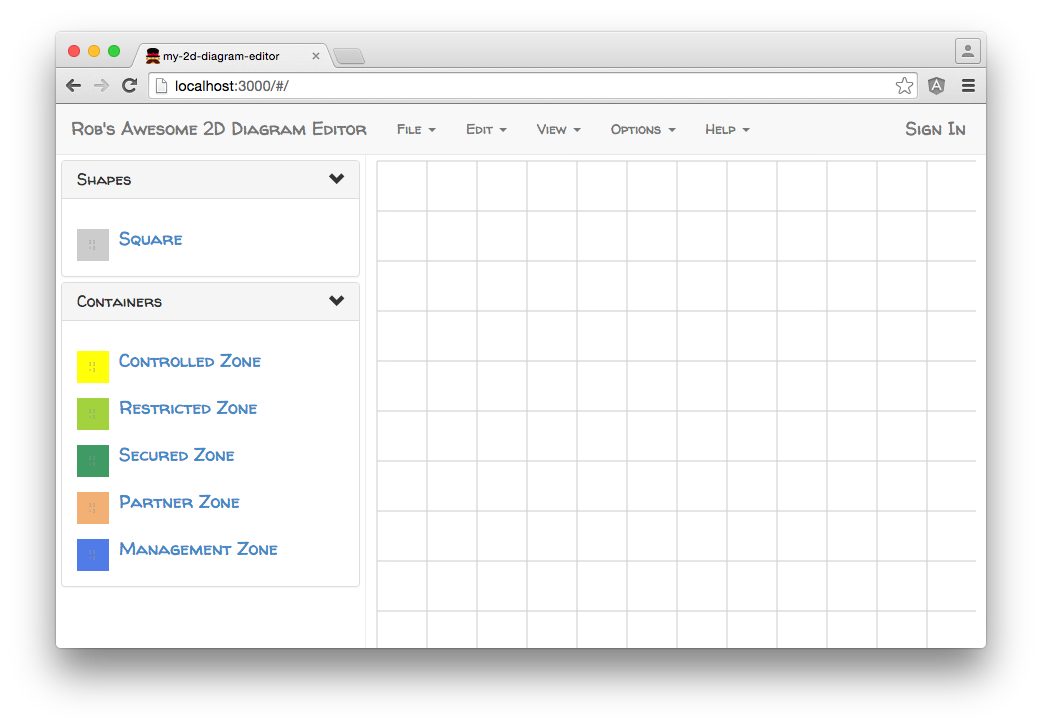
Take a look at the init() function, it gets called after the canvas is created by the fabric directive and uses angular-fabric to draw a grid:

Note: Why did we start x and y at 0.5? Why not 0? Take a look at this post.
What's Next
In the next post, we'll add a toolbar to our layout and continue working with (and learning about) Fabric.js.
For example, how to highlight ports:

And, how to draw connectors:

References:
- AngularUI Bootstrap: "Issue #394 - Responsive navbar" post and plunker
- Stackoverflow: "snap to grid" post and fiddle
- Stackoverflow: "connectors" post and fiddle
- Stackoverflow: Working with Canvas and AngularJS
- HTML5 Rocks: Native HTML5 Drag and Drop
Source Code:
- GitHub: My 2D Diagram Editor
