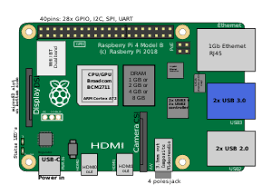
I want to use a Raspberry Pi 4 Model B as a Gateway to separate my Home network from my Home Lab network.
Internet Service Provider
My consulting business utilises a small business NBN plan (100/40 Mbps) and the provider supplied a Modem / Router combination with support for FTTN.
The Modem / Router's IP address is 192.168.20.1
Devices connected to my ISP's Modem / Router will be allocated addresses in the range 192.168.20.2 - 192.168.20.254.
Subnets
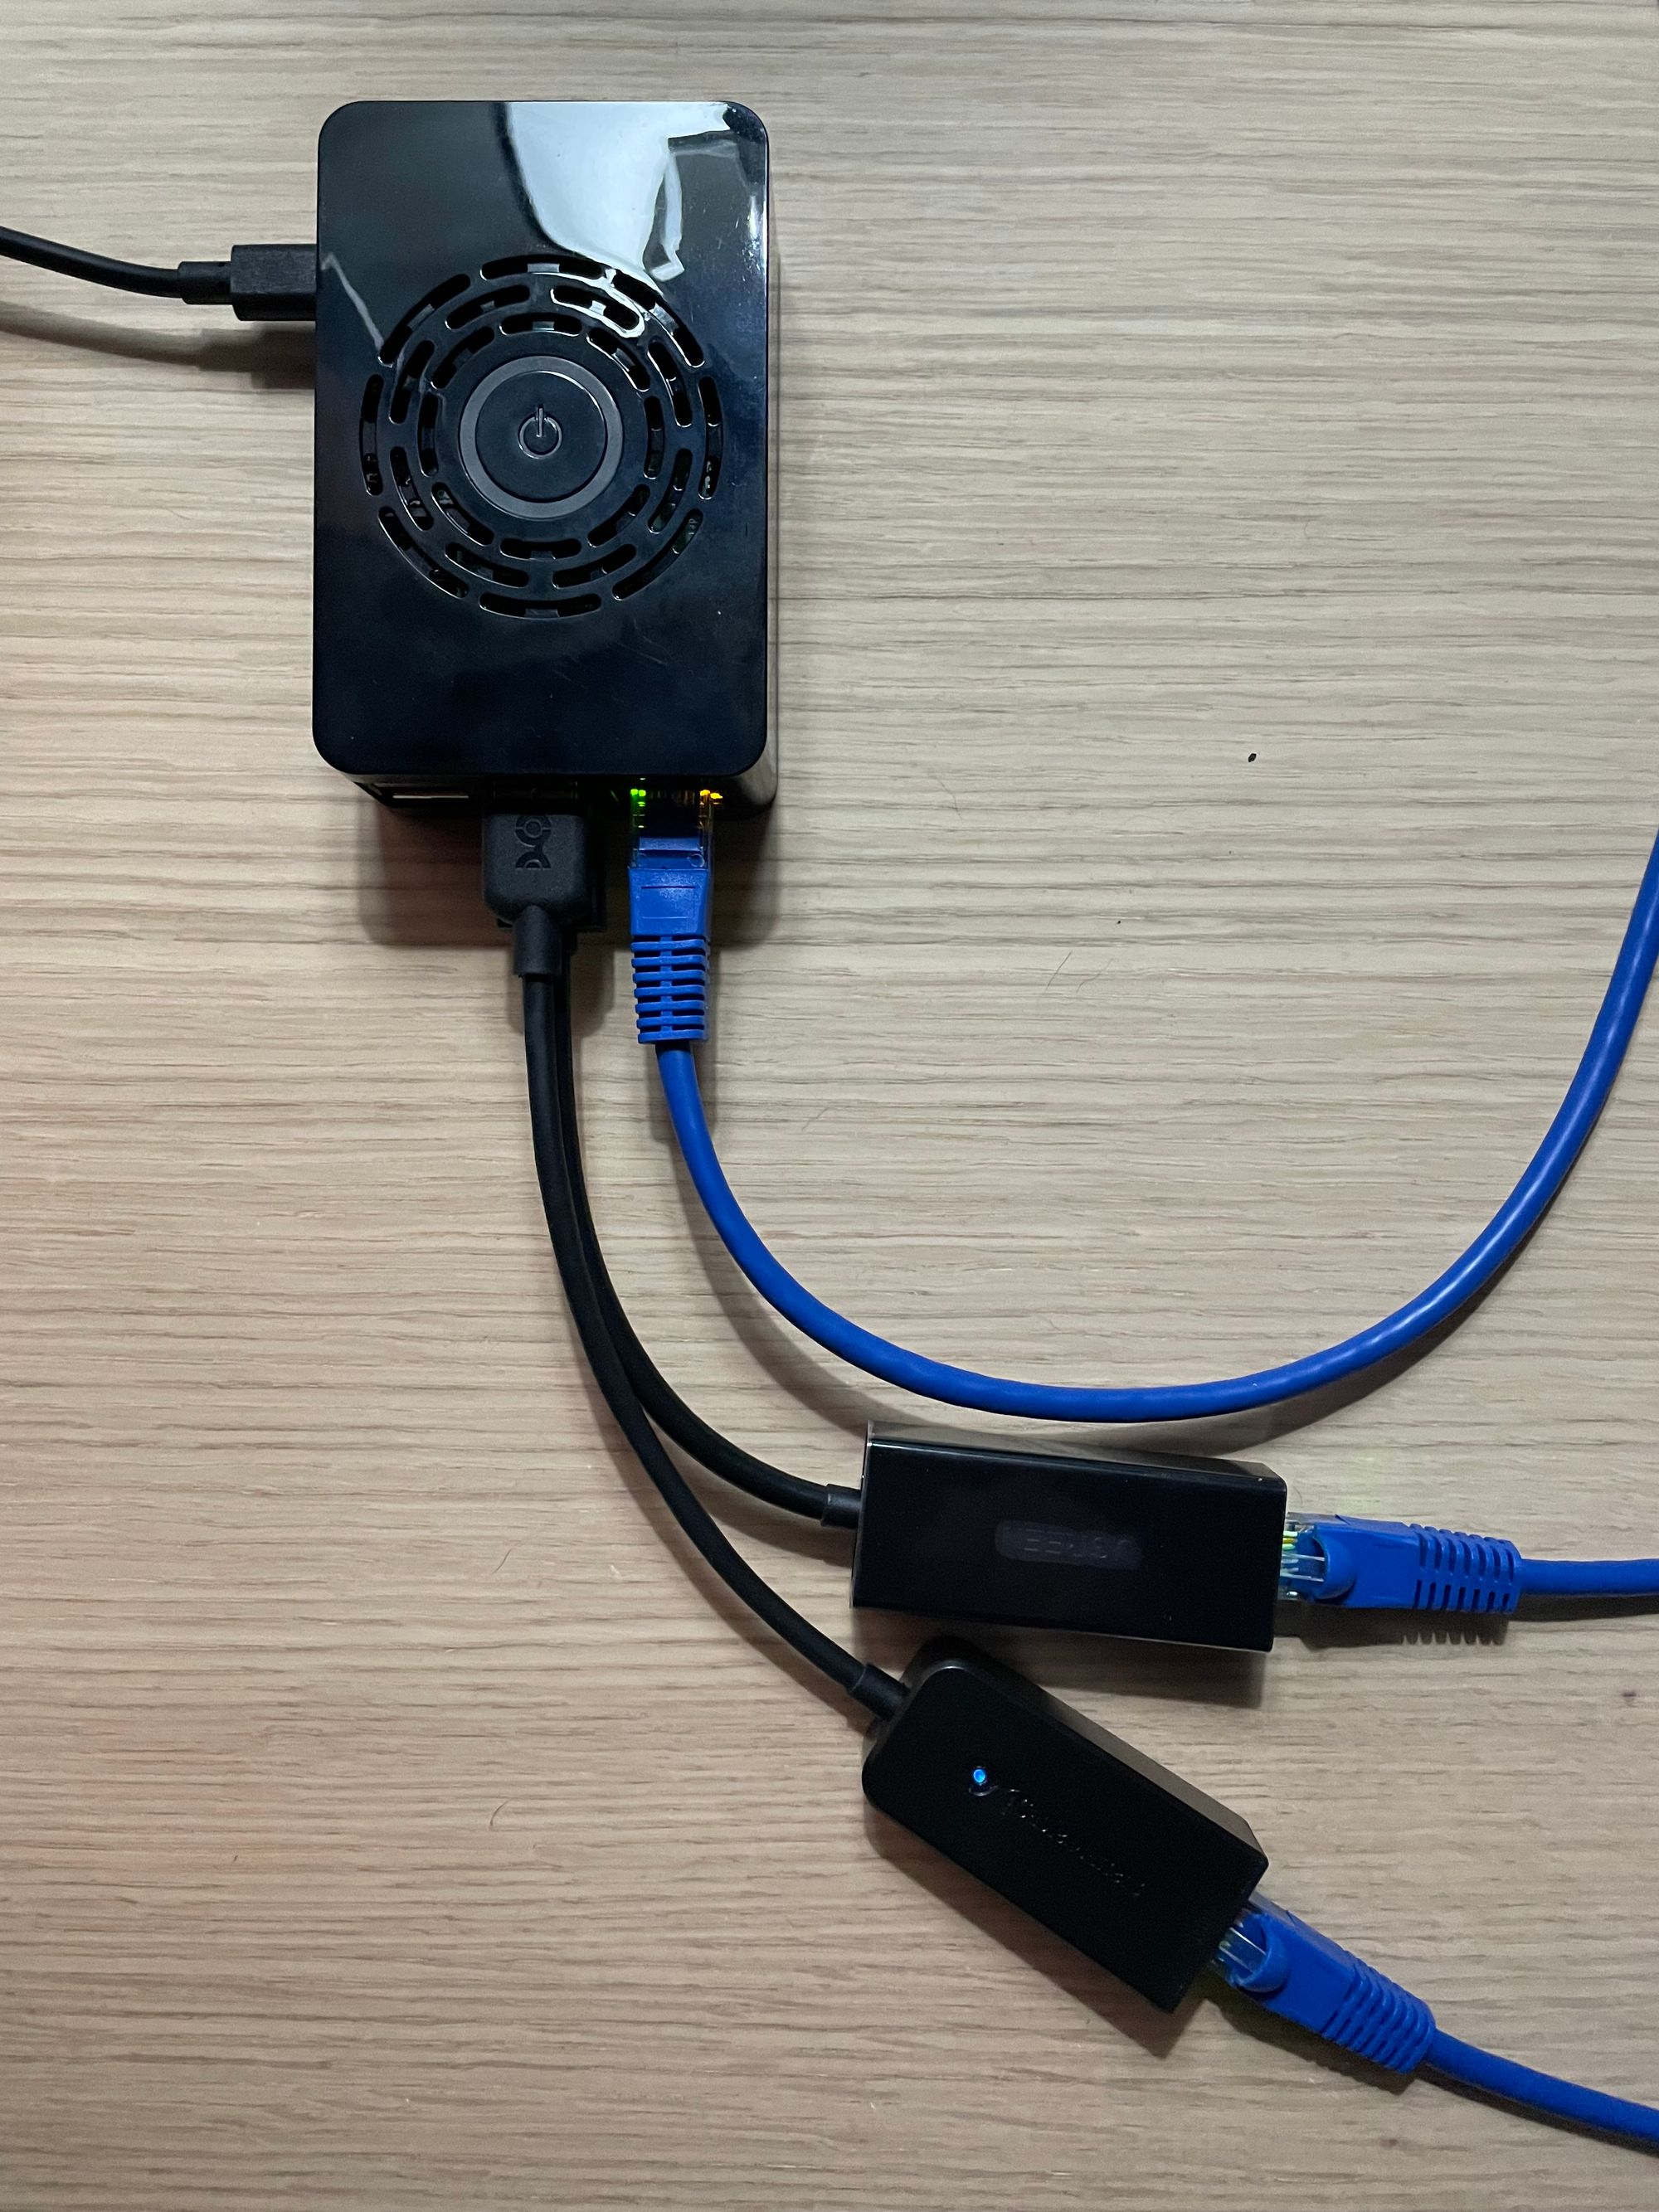
I purchased two USB 3.0 to Ethernet Adapters (a Cable Matters and a UGREEN) and a Okdo ABS case for my RPi 4:
Devices connected to my Home Lab Gateway's eth1 port will be allocated addresses in the range 192.168.101.2 - 192.168.101.254.
Devices connected to my Home Lab Gateway's eth2 port will be allocated addresses in the range 192.168.102.2 - 192.168.102.254.
ISP Modem / Router (192.168.20.1)
Gateway eth0 (192.168.20.2)
Gateway eth1 (192.168.101.1) -> (192.168.101.0/24)
Gateway eth2 (192.168.102.1) -> (192.168.102.0/24)
Home Lab Gateway
I used the Raspberry Pi Imagr (v1.7.1) to create a fresh install of Raspberry Pi OS Lite 64 bit (a port of Debian Bullseye with no Desktop environment).
I used the Imagr's Advanced options to: set a hostname (home-lab-gateway); enable SSH (public key only), set a username and password; set the locale settings and to skip the first-run wizard.
Then I used SSH to connect to the device and updated the operating system:
sudo apt update
sudo apt full-upgrade
Enable IP Forwarding
IP forwarding is also known as routing, to enable it we need to use the sysctl command:
sudo sysctl -w net.ipv4.ip_forward=1
To make the change persistent, we need to edit the /etc/sysctl.conf file:
sudo nano /etc/sysctl.conf
And add the following line to the bottom of the file:
net.ipv4.ip_forward = 1
Optional: To disable IPv6 add the following lines to the bottom of the file:
net.ipv6.conf.all.disable_ipv6 = 1
net.ipv6.conf.default.disable_ipv6 = 1
net.ipv6.conf.lo.disable_ipv6 = 1
The DHCP Daemon
The Raspberry Pi uses dhcpcd to configure TCP/IP across all of its network interfaces. We want to assign a static IP to each of the Home Lab Gateway's interfaces.
Edit the /etc/dhcpcd.conf file:
sudo nano /etc/dhcpcd.conf
And add the following lines to the bottom of the file:
...

# Home Lab Gateway configuration
interface eth0
inform ip_address=192.168.20.2/24
static routers=192.168.20.1
static domain_name_servers=192.168.20.1

interface eth1
static ip_address=192.168.101.1/24

interface eth2
static ip_address=192.168.102.1/24
We also need to update (if it does not exist, you must create it) /etc/iftab:
sudo nano /etc/iftab
iftab:
eth1 mac 11:22:33:44:55:66
eth2 mac aa:bb:cc:dd:ee:ff
You can use the following command to obtain the MAC addresses of the ethernet adapters:
ifconfig -a
To restart dhcpcd:
sudo systemctl daemon-reload && sudo systemctl restart dhcpcd
dnsmasq
dnsmasq is a lightweight service that we can use to issue IP addresses to devices in each of the Home Lab's subnets.
To install dnsmasq:
sudo apt install dnsmasq
To configure dnsmasq:
sudo nano /etc/dnsmasq.conf
dnsmasq.conf:
...

interface=eth1
bind-dynamic
domain-needed
bogus-priv
dhcp-range=192.168.101.3,192.168.101.254,255.255.255.0,24h

interface=eth2
bind-dynamic
domain-needed
bogus-priv
dhcp-range=192.168.102.3,192.168.102.254,255.255.255.0,24h
To restart dnsmasq:
sudo service dnsmasq restart
Use the following command to ensure that dnsmasq starts up (automagically) if you reboot the RPi:
sudo systemctl enable dnsmasq
iptables
To install iptables:
sudo apt install iptables
To save your iptables rules:
sudo apt install iptables-persistent
Packets arriving at the Gateway's eth1 interface from my Home Lab devices have to be modified such that the source address is equal to the Gateway's eth0 address:
sudo iptables -t nat -A POSTROUTING -o eth0 -j MASQUERADE
We also need to route outbound traffic from the eth1 interface to the eth0 interface and allow inbound traffic (established connections) from the eth0 interface to the eth1 interface (return traffic from the Internet):
sudo iptables -A FORWARD -i eth1 -o eth0 -j ACCEPT
sudo iptables -A FORWARD -i eth0 -o eth1 -m state --state RELATED,ESTABLISHED -j ACCEPT
Check the rules:
sudo iptables -S
Save the changes:
sudo netfilter-persistent save
ISP Modem / Router - Static Routes
I used the ISP Modem / Router's web UI (Advanced -> Routing) to configure a static route to the each subnet, for example:
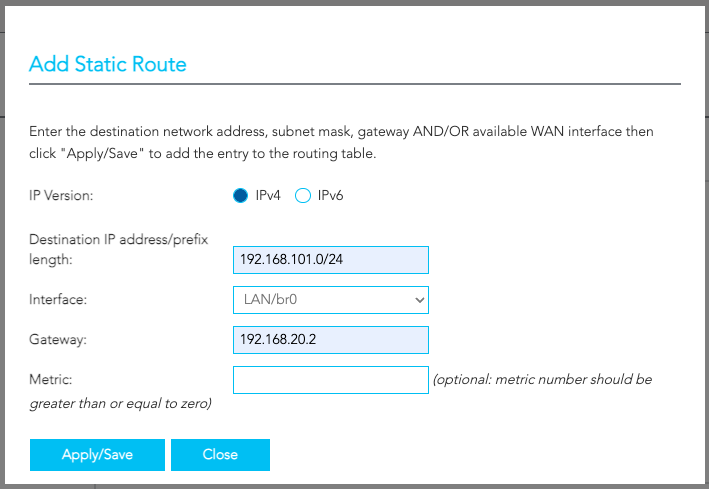
Note: The 'Gateway' setting is for the next hop (i.e., if the ISP Modem / Router's IP address is: 192.168.20.1 the next hop is 192.168.20.2).
nmap
You can use nmap to check which devices have been allocated IP addresses in a subnet, for example:
sudo nmap -sn 192.168.101.0/24
References
- Raspberry Pi docs: Setting up your Raspberry Pi
- Raspberry Pi docs: The DHCP Daemon
- Raspberry Pi docs: Install a Firewall
- Debian wiki: iptables
- DigitalOcean tutorial: How to list and delete iptables rules