In previous posts, I have written about getting started with Angular Material and working with Angular Material's toolbar and sidenav. I have also written about getting started with Flowable and working with Flowable's REST API.
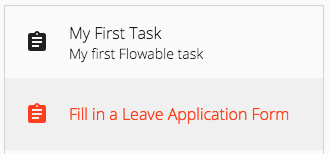
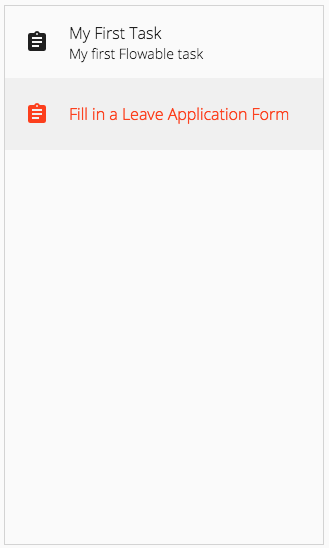
In this post, we'll use Angular, Angular Material and Flowable's REST API to create a bespoke Task List component:
The Angular CLI
Many of the recent improvements in Angular were to the Angular CLI. One of the most popular being the use of ng-packagr to generate and build Angular libraries.
Flowable Library
Lets start by using the Angular CLI to generate an Angular library:
ng generate library flowable --prefix=flow
Tasks Service
Now we can use the Angular CLI to generate the Tasks service in the flowable library:
ng generate service services/tasks/tasks --project=flowable
We'll use Angular's HttpClient to interact with Flowable's REST API.
Let's take a look at the Tasks service's getTasks() method:
  public getTasks(): Observable<TaskListModel>   {

    const endpoint = '/flowable-task/process-api/runtime/tasks'

    return this.httpClient.get<any>(endpoint, httpOptions)
      .pipe(
        tap(() => {
          this.logger.info('TasksService: getTasks() completed');
        }),
        catchError(this.handleError('getTasks', []))
      );

  }
The call to GET runtime/tasks returns a list of tasks. We just need to provide the endpoint's URI ('/flowable-task/process-api/runtime/tasks') and any required Http options:
const httpOptions = {
  headers: new HttpHeaders({
    'Content-Type': 'application/json',
    'Authorization': 'Basic ' + btoa('admin:test')
  }),
  params: null
};
CORS
During development we can use the proxying support in webpack's dev server to highjack certain URIs and send them to a backend server:
ng serve --proxy-config=proxy.conf.json
proxy.conf.json:
{
  "/flowable-task": {
    "target": "http://localhost:8080",
    "secure": false,
    "logLevel": "debug"
  }
}
Task List Component
Use the Angular CLI to generate the Task List component in the flowable library:
ng generate component components/task-list --project=flowable --skip-import
Let's take a look at the Task List component:
@Component({
  selector: 'flow-task-list',
  templateUrl: './task-list.component.html',
  styleUrls: ['./task-list.component.scss']
})
export class TaskListComponent implements OnInit, OnDestroy {

  public items: TaskModel[];
  public selectedItem: TaskModel = null;

  private subscriptions: Subscription[] = [];

  constructor(private tasksService: TasksService,
              private logger: LoggerService) {}

  public ngOnInit() {

    let modelSubscription: Subscription = new Subscription();
    this.subscriptions.push(modelSubscription);

    modelSubscription = this.tasksService.getTasks().subscribe(model => {

      this.items = model.data;
      this.selectedItem = this.items[0];
    });
  }

  ...

}
We inject the TasksService in the component's constructor and then in the ngOnInit() lifecycle hook we call the Task service's getTasks() method.
The data returned by the getTasks() method is assigned to the component's items property and the first item in the items array to the selectedItem property.
In the component's template we use a <mat-nav-list> element to display the list of items (tasks):
  <div class="crm-task-list-container">

    <mat-nav-list>

      <a *ngFor="let item of items"
         mat-list-item>

        <mat-icon matListIcon class="crm-task-list-icon">
          assignment
        </mat-icon>

        <p mat-line>
          {{item.name}}
        </p>

        <p mat-line>
          {{item.description}}
        </p>

      </a>

    </mat-nav-list>

  </div>
To keep track of the 'selected' item (task) we also need to add a click event binding and a click event handler.
Add a click event binding
Add a click event binding to the <a> element like this:
<a *ngFor="let item of items"
   mat-list-item
   [class.list-item-active]="item === selectedItem"
   (click)="onSelect(item)">
Add the click event handler
Add the onSelect() method, which assigns the clicked item (task) from the template to the component's selectedItem property:
public onSelect(task: TaskModel) {
  this.selectedItem = task;
}
What's Next
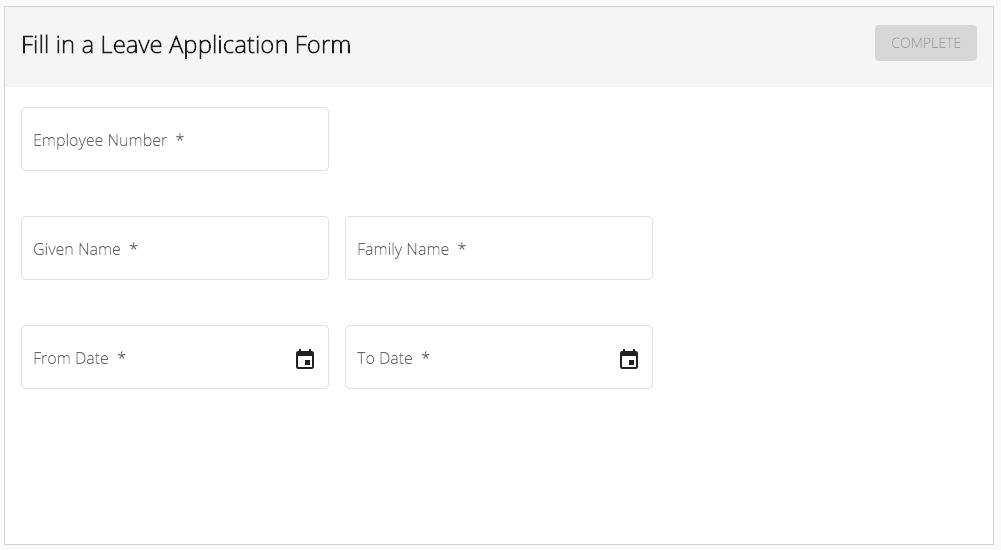
In the next post, we'll use Angular, Angular Material and Flowable's REST API to create a bespoke Task component:
Source Code:
- GitHub: Serendipity
- GitHub: Serendipity - Flowable library
References:
- Flowable docs: REST API
- GitHub: Flowable REST API Documentation
- Spring docs: CORS